How To Make Your Toilet Flush Better Tips and Tricks

At some point in our life you will have toilet flushing issues and will need to make your toilet flush better. Usually all that is required to fix this common toilet problem, are a few simple tricks. If your toilet is very old, like over twenty five years old, it may be worth while to just replace the whole toilet as a unit. This way you start off with brand spanking new parts good for many years to come and is really not to expensive to do.

Some people would rather not replace their toilet and would like to just improve the flush, so it is close to flushing like new again. Let’s assume the internals inside your toilets tank such as your seals and floats etc are OK! Yet you still have a poor flushing issue. Follow these steps first before proceeding to the next level.

  1. Is Your Toilet Bowl Partially Plugged? What you can do to tell if your toilet bowl is partially plugged or not, is to pour a gallon off water all at once into the toilet bowl and see if it flushes right away and properly! If it does flush properly, move on to step 2. It it does not flush properly, there is your problem and you need to un-plug your toilet bowl before moving on to step 2.
  2. If you are now on step 2, we know your toilet bowl is not plugged. The next thing you will do is remove your toilet tank lid and see if your water level correct. There will be a mark on the side of the tank, where your water level should be set at for best flushing power. If the water level is correct, but still has a poor flushing problem, move on to step 3. If your water level is to high or to low, you must set it by adjusting your water tank float assembly.
  3. If you are now on step 3 you know your toilet bowl is not plugged and your toilet tank level is correct. The next thing you will do is clear the toilet bowls flush holes located just underneath the inside rim of your toilet bowl. You will have to kneel down to see these holes as they are small. You will need to get a small drill bit, or possibly a piece of steel coat hanger and push it through each of these small holes to clear out the built up junk. These holes over time get partially blocked or some fully block and will cause your toilet flushing power to decease significantly. Once these holes are thoroughly cleaned out, check your toilets flushing power to see if improved or not. You are now ready to go to the next level!

After you have completed the steps above you will now apply the next set of tricks/steps to improve your toilets flushing power.

  1. Turn of your toilets water tank water supply. The water supply valve will be located on a tube connecting the toilet to the water supply coming out of the wall or floor. There will be a knob or shut of valve, turn it to your right to close it and shut off the water supply. Now remove your toilets tank lid and flush your toilet. This will allow almost all the water to flow out from the toilet tank and not be replaced until you turn back on the water supply. Now pour into your toilet tank about one gallon of common house hold bleach ( open windows for ventilation). Allow the bleach to just sit inside the toilet tank for 15-20 minutes, but no longer as can start to eat seals. After 15-20 min flush toilet as usual, so all the bleach can go through the internals of your toilet and fee up and dissolve built up junk, which tends to reduce your flushing power. Turn your tank water supply back on (open at least 2 full tuns or completely) and let the tank fill up, then flush your toilet to flush out the bleach and junk repeat this 3-4 times to thoroughly flush out the bleach.
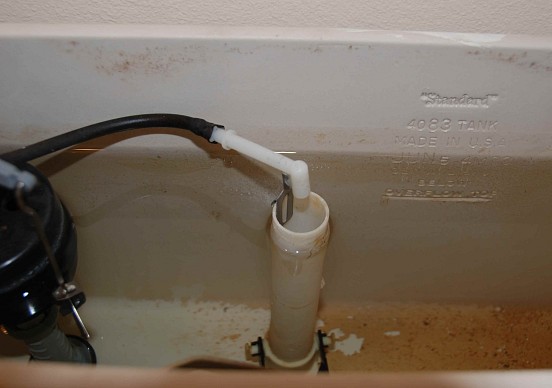
  2. Your next step is to pour about 1 quart of plain white vinegar down the tube inside your toilet tank, that your water tank rubber fill hose will be connected to. Just remove the rubber hose, pour the white vinegar down the tube using a funnel, then let this sit for at least 2 hours or as long as possible before flushing the toilet again. This again will help dissolve junk and disinfect your toilet bowl internals hopefully improving your toilets flushing power.

After doing all of this your toilet should have a much better flushing power. You can do the 2 steps in the second level every so often as your regular toilet maintenance and it will keep it working like new as long as possible. As you can see a variety of issues can cause your toilet to loss it’s flushing power, but by applying these easy home fix tips and tricks your toilet will be flushing away in no time!

Other articles/websites  you may want to take a peek at if you play the lottery:

Powerball Lottery Tips To Win

Lotto Guy Lottery System Hot Winning Formula

Lottery Lotto

Lotto Winning Strategies


Leaky Toilet Easy Fix

Most people at some point will find they are faced with a toilet issue and the most common being a leaky toilet. Now when this occurs you have a few options to choose from, you can either call a plumber or you can fix the leaky toilet yourself. Calling a plumber will cost more money as he is a professional and knows what to do, however in some cases calling a plumber might not be necessary as you could easily fix the problem yourself and we can help you with that.

Toilet leaks are very common and do often start small unlike other leaks you may get in your home and can go unnoticed. The best way to catch a leak in your toilet to do a check or procedure ever six months. Toilet leaks can waste 2,500 litres a month, which is enough to fill your bathtub about 28 times. So the toilet leak test is really something every home owner should be doing.

Here is the test steps:

Put several drops of food coloring in your toilet tank and wait about 15 minutes.

Then look into the toilet bowl, if the water in the bowl changes color, you have a leak.

If you have a leak, you can try some very simple repair tips first, if these do not work then you need to call a plumber.

The number one culprit for most toilet leaks is the flapper located on the inside bottom of your toilet tank. It needs to seal properly to hold the water in, but over time the seal can wear causing a leak.

Check the flapper by rubbing the bottom of the flapper with your fingers, if it leaves streaks of rubber on your fingers, it needs to be replaced.

You can easily remove the old flapper and take it along with you, so you get the correct part. Then just re-install and you should be good to go.

Also sometimes just a good cleaning of the flapper seal area will allow it to work again properly, but in general flappers are cheap to buy, so we would suggest going with a new one.


Play The Lottery Check These Websites Out To Win Easier!

Lottery Group

Lotto Winning Strategies

Lotto Insider

Lottery Systems Review Group


How To Easily Improve Toilet Flush Power

When it comes down to how your toilet is flushing. More powerful toilet flush is always a better thing to have. We’ll tell you how to get a more powerful flush. We have all been there a few times. You flush your toilet and it seems to be having a hard time flushing, even small sessions. The flush of most all toilets over time will get worse and worse. You need to apply a few easy tips to keep your toilet flushing like new.

The reason your toilet loses it’s flushing power is due to a few things. The first thing is your toilet tank water level. Make sure to adjust the water lever in the tank to the line inside the tank. The next thing to check is if your toilet is slightly plugged. To check this, just take a gallon or so of water in a pale and dump it into your toilet bowl. If the toilet flushes fine, there is no clog and we can move on to the next step.

If all is fine with the last two steps. Your flushing power loss is most likely due to buildup inside the toilet. To remove this water deposit buildup. You need to remove the toilet tank lid and find the over-flow tube. It will be the tube with a hose clipped to the inside of the tube. Next you pour a cup or two of white vinegar down that over-flow tube. Let it sit for at least two hours before flushing the toilet. If can, it would be even better to let sit over night to really work it’s self in. This  will loosen the junk inside your toilet.

Toilet Over Flow Tube

Toilet Over Flow Tube

Use White Vinegar And Dawn Dish Detergent To Flush Out Junk From Your Toilet

After you do the white vinegar procedure, you now will move on to the next step to improve your toilets flushing power. For this step you will need some Dawn liquid dish detergent. You will squeeze a medium amount of detergent into the toilet tank over-flow tube. Just like you did with the white vinegar. You will let this detergent sit and work it’s way through your toilet for at least two hours before flushing your toilet. The detergent loosens up even more built up junk inside your toilet. Then will flush it out when you flush your toilet again.

You may need to do this procedure a few times to really clean the toilet out good. Then after that do the procedure as a weekly or monthly routine toilet maintenance.

This very simple easy to do procedure to improve your toilets flushing power can save you from big expenses from toilet repairs. It will keep your toilet working like new for many years to come and the cost to apply these procedures is very inexpensive.

Read more article reviews below that can help you win the lottery:

How To Easily Lower Water Bill Secret Tip

Lotto Guy Lottery System Formula Works

Lotto Guy Lottery System Real Lotto Winning System

Lottery Lotto

Lotto Review

Lotto Luck

How To Install or Replace A Toilet Correctly

Before starting to install a new toilet or replace your old toilet, you must know how to do it correctly. Start off you must shut off the water valve located next to your toilet and if replacing your old toilet flush your toilet, so all water is gone and no water will fill up the tank again. You will then have to clean out he excess water inside your toilet tank. Now remove the old toilet, take the tank off off the bowl, then bowl of the floor, then plug the hole in floor with rags.

Materials And Tools You Will Need For The Project:

  • Two-piece Toilet
  • Plumber’s Putty (if needed)
  • Supply Tube (If Needed)
  • Toilet To Floor Bolts (New Ones)
  • Toilet Seat
  • Flange (if needed)
  • Wax Ring Replacement
  • Shut Off Valve
  • Screwdriver Set
  • Mini Hacksaw
  • Tubing Cutter (If Needed)
  • Adjustable Wrenches
  1. DETERMINE WHAT FLANGE YOU NEED:

If you are going to reuse the old flange, it is a good idea to replace the 3/16-inch flange bolts as they are cheap. If you are going to replace the flange, it must be screwed into a wooden floor. If replacing a flange on concrete floor use Self-tapping concrete screws for concrete.


2. PLACE WAX RING ON TOILET:

Place the wax ring on the bottom part of your toilet. The actual wax ring size will vary with the size of the flange you have. You must be sure to purchase the proper size. A 3 inch neck will fit a 3 inch closet elbow, a 4 inch neck will fit a 4 inch closet elbow. If the closet elbow is 4 inches and the neck is 3 inches in diameter, purchase a 4×3 reducer.


3. SET THE TOILET BOWL:

Straddle the toilet bowl and lift up using your legs, not your back. Set the toilet slowly over the anchor bolts, then sit on the toilet, rocking it back and forth to seat the wax ring in place. You may need another person to guide you when setting the toilet over the anchor bolts.


4. TIGHTEN THE NUTS.

Tighten the nuts down on both anchor bolts until they are about hand-tight. Use an adjustable wrench or socket and move from one side of the toilet to the other, alternate the tightening of each nut about a half-turn each time until it is snug. Don’t over-tighten these nuts.


5. CUT FLANGE BOLT TO SIZEINSTALL THE BOLT CAP:

Using a mini hacksaw, cut the flange bolts so only 1/4 to 1/2 inch extends above the bolt. This is done so the cap cover will fit over firmly. Most bolts will have snap-offs about every 1/2 inch or so, you should still cut through the bolt, so you don’t bend the bolt. Some types of caps will snap over the bolt while some have to be filled with plumber’s putty and seated over the anchor bolt so it stays in place.


6. SET THE TANK ANCHOR BOLTS:

Put the tank anchor bolts in the holes of the tank, this will help guide the tank onto the bowl easier. Lift the tank, place it over the bowl, then guide the tank bolts into the corresponding holes on the toilet bowl.


7. TIGHTEN THE TANK BOLTS:

Using an adjustable wrench, hold the wrench over the tank bolt nut while you tighten the top bolt with a screwdriver. Do not over-tighten, you do not want to crack the tank or the toilet bowl.


8. CONNECT SUPPLY PIPE TO THE TANK:

Put the water supply line back on by hand-tighten until snug. Slide the compression nut over the other end, and then place the compression ring over the end of the pipe. Seat the end in the outlet of the shutoff valve. Now you can tighten all up re-open the water valve to fill the toilet tank full, then check for leaks, done!


Some times you may need to replace the supply pipe with another pipe to fit or a flexible universal connection. All of the tools and material including the replacement toilet can be found at stores such as Home Depot, Lowe’s, Home Hardware etc. You now know the basics on how to install or replace a toilet correctly! You can watch a toilet replacement video HERE.

More articles/lottery websites you should read that can help you win the lottery:

Lotto Logic

Lotto Winning Strategies

Lottery Group

How To Play The Lottery To Win Frequently